Info about MQTT
This session we tell stories utilizing a network of connected things. For this we need to engage with some technologies that might be new. It might seem a lot. But you don't necessarily need to understand every bit in order to use it as a design material.
Background and infrastructure
We will use MQTT to connect devices and create our network. But what is MQTT? MQTT stands for Message Queuing Telemetry Transport, which is fancy wording for sending messages efficiently. So that is what we will do; we will send messages from ItsyBitsy to ItsyBitsy .
This sounds simple - and it’s designed to be as easy as possible! - but there are sometimes difficulties in getting the WiFi working, or understanding a new way of thinking about programming.
However, the tradeoff is that suddenly you can connect lots of things together - if your ItsyBitsys can talk to each other, then you can make things happen at a distance, for a connected, magic kind of interaction. If you are thinking in terms of sending messages, then it doesn’t matter what is sending the message, so your computer can join in, or your phone, and things become a lot more fluid. It also means lots of things can talk at once - you don’t need to wire in extra devices, you just point them at the same MQTT server, and they join in! You can send a ‘hello’ message to make 20 LEDs wiggle at the same time, make a glowing LED bounce between multiple devices spread around the room, trigger a sound in a max patch when someone touches a touch sensor and so on.
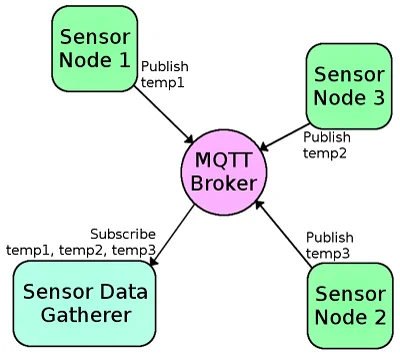
MQTT works as a “Publish and Subscribe” system - messages get sent out on a particular ‘topic’ and anything can listen to that topic to get the messages. As your system gets more complex, you can keep adding devices to it - see this example picture from Sparkfun that shows 4 devices connects - three that collect sensor information, and one that Does Something with it:
A. Listening to messages and responding
- Make sure you have the
MQTT.pyfile in the main root of your itsy-bitsy. If the file is already present in your itsybitsy, you can skip this step.
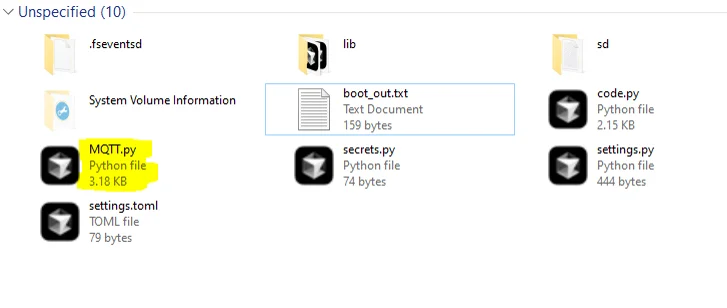
If it is not, download it from here and paste in in the root folder of the board.
- Make sure you have the
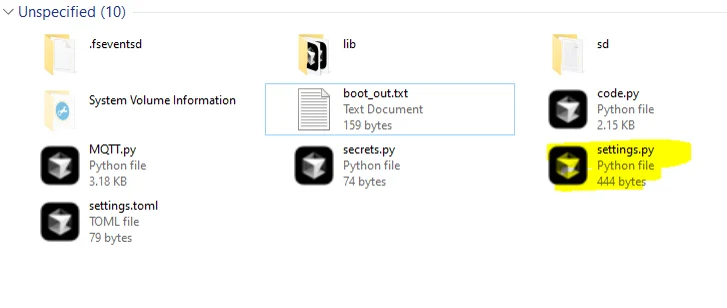
settings.pyfile in the main root of your itsy-bitsy. The content of the file should look like below. You have to change the<your device name. For now the topic is “ledcontrol”.
settings ={
"ssid": "<your Wi-Fi network>",  # Your WiFi SSID
"password": "<your Wi-Fi password>",  # Your WiFi Password
"mqtt_clientid": "<your device name>",  # Unique client ID for your device
"broker": "<your-namespace>.cloud.shiftr.io", # MQTT Broker URL
"mqtt_user": "<your broker username>", # MQTT Username
"mqtt_password": "<your broker password>",# MQTT Password
"mqtt_port": 1883,  # Default MQTT Port
"mqtt_topic": "ledcontrol"  # MQTT topic for LED control
}
- Now it is time to change the
code.pyfiles. Based on what we want to achieve, we will have different codes in different itsybitsies. just for the sake of testing copy the code below and make sure everything is up and running and connected.
# Board 1: LED Color Controller
# This board has one NeoPixel LED that responds to MQTT messages.
# Left button = more green, Right button = more red

import time
import board
import neopixel
from MQTT import Create_MQTT
from settings import settings

time.sleep(2)

# ==========================================
# LED Configuration
# ==========================================
LED_PIN = board.D13
NUM_LEDS = 1
COLOR_STEP = 25  # How much to shift color per button press (0-255)

# Color state: 0 = full green, 255 = full red
color_value = 127

# ==========================================
# NeoPixel Setup (same as neopixel_led.py)
# ==========================================
leds = neopixel.NeoPixel(LED_PIN, NUM_LEDS, auto_write=False, pixel_order=neopixel.GRBW)

def update_led():
    """Update LED color based on current color_value (0=green, 255=red)"""
    red = color_value
    green = 255 - color_value
    blue = 0
    white = 0
    leds.fill((green, red, blue, white))  # GRBW order
    leds.show()

# Initialize LED
update_led()

print(">>> [Board 3] LED Controller starting...")
print(f"    LED initialized at color value: {color_value}")

# ==========================================
# MQTT Setup
# ==========================================
client_id = settings["mqtt_clientid"]
mqtt_topic = settings.get("mqtt_topic")

def on_message(client, topic, message):
    global color_value
    print(f"[Received] Topic: {topic}, Message: {message}")

    msg = message.strip().lower()

    if msg == "left":
        # More green (decrease color_value)
        color_value = max(0, color_value - COLOR_STEP)
        print(f"<<< More GREEN: color_value = {color_value}")
        update_led()

    elif msg == "right":
        # More red (increase color_value)
        color_value = min(255, color_value + COLOR_STEP)
        print(f">>> More RED: color_value = {color_value}")
        update_led()

    elif msg == "center":
        # Reset to middle (yellow)
        color_value = 127
        print(f"=== RESET: color_value = {color_value}")
        update_led()

mqtt_client = Create_MQTT(client_id, message_handler=on_message)
mqtt_client.subscribe(mqtt_topic)

print(f">>> [MQTT] Subscribed to topic: {mqtt_topic}")
print(">>> Waiting for button commands...")

# ==========================================
# Main Loop
# ==========================================
while True:
    try:
        mqtt_client.loop(timeout=0.2)
    except Exception as e:
        print(f"MQTT error: {e}")
        time.sleep(1)
        continue

    time.sleep(0.01)
if everything is okay you will see this:

B. Sending messages for response
- The end goal is that we create a wireless remote to control the color of a RGBLED. we need two buttons to be connected to one board and two other connected
- for the first board which has the led connected to it upload this code to the
code.py. you need one led connected to this board. read the code to understand what pin you need to connect it to.
# Board 1: LED Color Controller
# This board has one NeoPixel LED that responds to MQTT messages.
# Left button = more green, Right button = more red

import time
import board
import neopixel
from MQTT import Create_MQTT
from settings import settings

time.sleep(2)

# ==========================================
# LED Configuration
# ==========================================
LED_PIN = board.D13
NUM_LEDS = 1
COLOR_STEP = 25  # How much to shift color per button press (0-255)

# Color state: 0 = full green, 255 = full red
color_value = 127

# ==========================================
# NeoPixel Setup (same as neopixel_led.py)
# ==========================================
leds = neopixel.NeoPixel(LED_PIN, NUM_LEDS, auto_write=False, pixel_order=neopixel.GRBW)

def update_led():
    """Update LED color based on current color_value (0=green, 255=red)"""
    red = color_value
    green = 255 - color_value
    blue = 0
    white = 0
    leds.fill((green, red, blue, white))  # GRBW order
    leds.show()

# Initialize LED
update_led()

print(">>> [Board 3] LED Controller starting...")
print(f"    LED initialized at color value: {color_value}")

# ==========================================
# MQTT Setup
# ==========================================
client_id = settings["mqtt_clientid"]
mqtt_topic = settings.get("mqtt_topic")

def on_message(client, topic, message):
    global color_value
    print(f"[Received] Topic: {topic}, Message: {message}")

    msg = message.strip().lower()

    if msg == "left":
        # More green (decrease color_value)
        color_value = max(0, color_value - COLOR_STEP)
        print(f"<<< More GREEN: color_value = {color_value}")
        update_led()

    elif msg == "right":
        # More red (increase color_value)
        color_value = min(255, color_value + COLOR_STEP)
        print(f">>> More RED: color_value = {color_value}")
        update_led()

    elif msg == "center":
        # Reset to middle (yellow)
        color_value = 127
        print(f"=== RESET: color_value = {color_value}")
        update_led()

mqtt_client = Create_MQTT(client_id, message_handler=on_message)
mqtt_client.subscribe(mqtt_topic)

print(f">>> [MQTT] Subscribed to topic: {mqtt_topic}")
print(">>> Waiting for button commands...")

# ==========================================
# Main Loop
# ==========================================
while True:
    try:
        mqtt_client.loop(timeout=0.2)
    except Exception as e:
        print(f"MQTT error: {e}")
        time.sleep(1)
        continue

time.sleep(0.01)- open the
settings.pyand make sure to choice a specific topic and name of your device. Go to part A and look at step 2 if it sounds confusing.After setting up and running the code, you should see something like this in your serial monitor.
- Now let’s connect and modify the second board. for the second upload the code below to the
code.py. You need two buttons connected to this board. Read the code to understand what pins you need to connect them to.
# Board 2: Two Buttons Controller
# This board has two buttons (left and right) that send MQTT messages
# to control a servo on another board.

import time
import board
import digitalio
from MQTT import Create_MQTT
from settings import settings

time.sleep(2)

# ==========================================
# Button Setup
# ==========================================
# Left button on pin D3
button_left = digitalio.DigitalInOut(board.D3)
button_left.direction = digitalio.Direction.INPUT
button_left.pull = digitalio.Pull.UP  # Use internal pull-up resistor

# Right button on pin D4
button_right = digitalio.DigitalInOut(board.D4)
button_right.direction = digitalio.Direction.INPUT
button_right.pull = digitalio.Pull.UP  # Use internal pull-up resistor

# Track previous button states for edge detection
prev_left = True  # Pull-up means True when not pressed
prev_right = True

print(">>> [Board 1] Button Controller starting...")

# ==========================================
# MQTT Setup
# ==========================================
client_id = settings["mqtt_clientid"]
mqtt_topic = settings.get("mqtt_topic")

mqtt_client = Create_MQTT(client_id)

print(f">>> [MQTT] Connected. Publishing to topic: {mqtt_topic}")

# ==========================================
# Main Loop
# ==========================================
while True:
    try:
        mqtt_client.loop(timeout=0.1)
    except Exception as e:
        print(f"MQTT error: {e}")
        time.sleep(1)
        continue

    # Read current button states (False when pressed due to pull-up)
    current_left = button_left.value
    current_right = button_right.value

    # Detect left button press (falling edge: was True, now False)
    if prev_left and not current_left:
        print("<<< Left button pressed - sending 'left'")
        mqtt_client.publish(mqtt_topic, "left")

    # Detect right button press (falling edge: was True, now False)
    if prev_right and not current_right:
        print(">>> Right button pressed - sending 'right'")
        mqtt_client.publish(mqtt_topic, "right")

    # Update previous states
    prev_left = current_left
    prev_right = current_right

    time.sleep(0.05)  # Small delay for debouncing
# Write your code here :-)
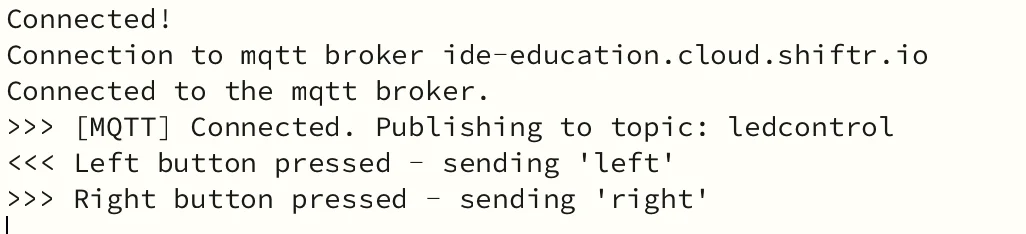
If this are right you’ll see something like this in your serial monitor:
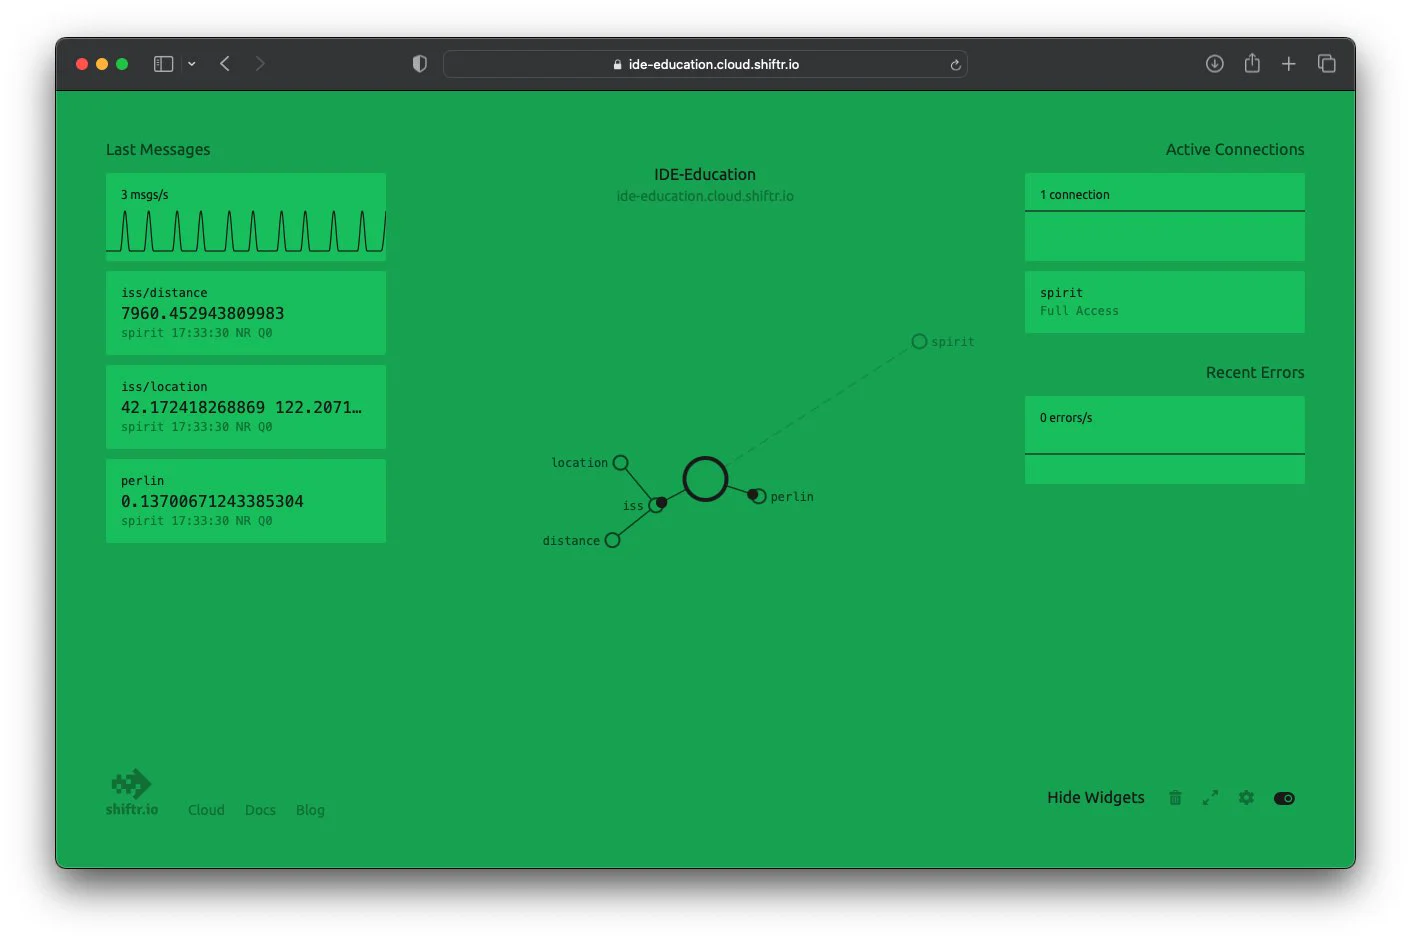
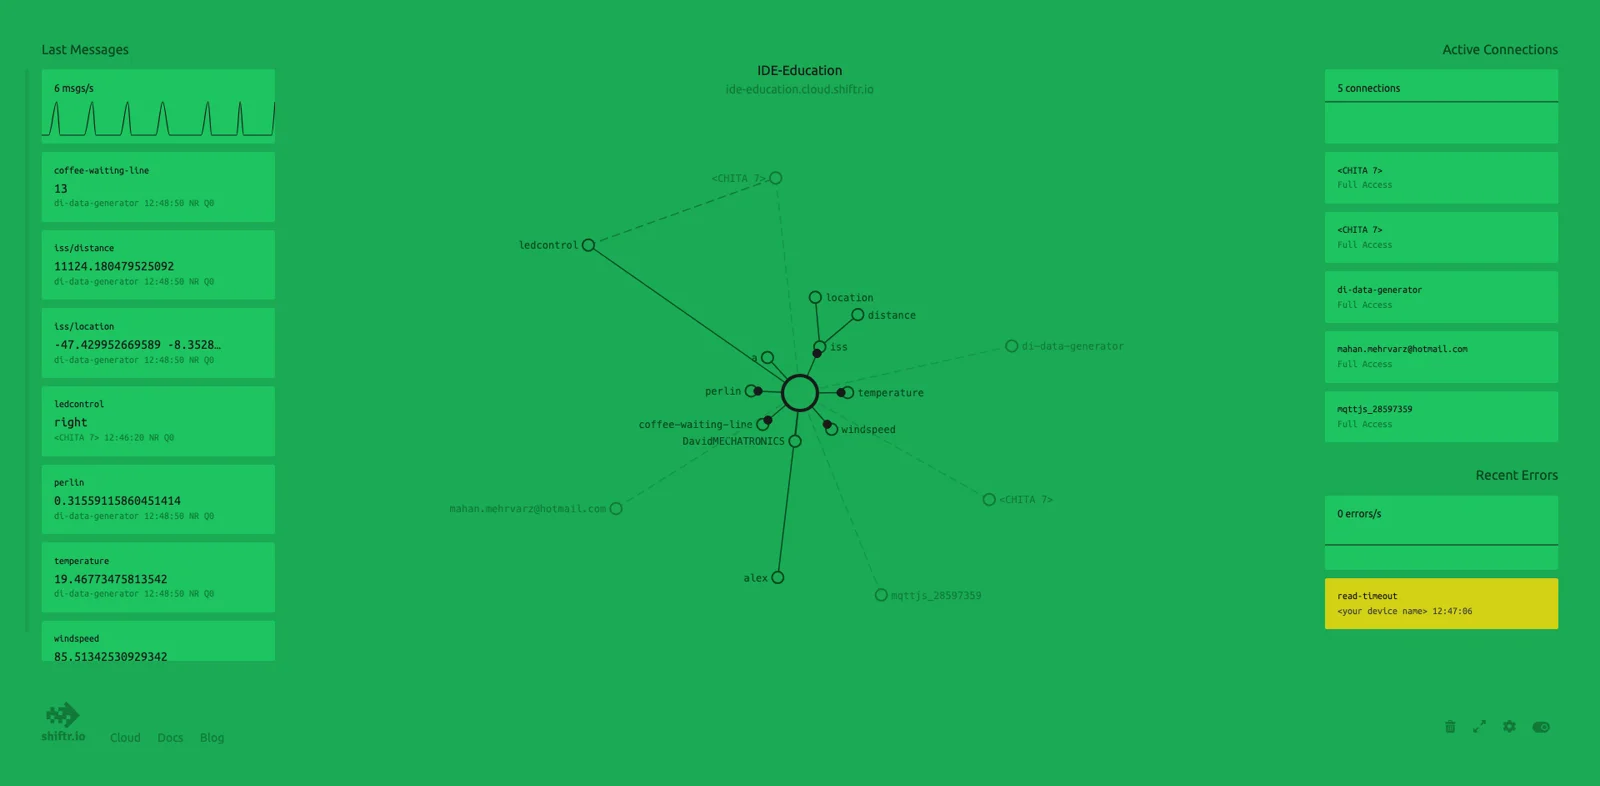
You can also find your chosen device name and topic in this link.
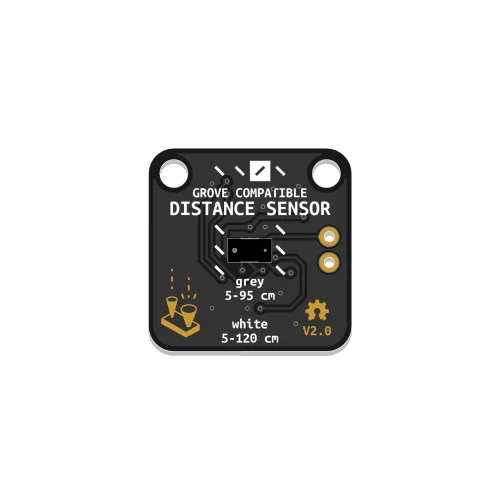
- After trying the two board now let’s improve. Try to make a servo motor controlled with the two buttons. so instead of a led light it is a servo motor that moves in different directions with the same buttons. Also instead of buttons use distance (time of flight) sensors.
C. Connecting to P5 - listening to the computer
Here we want you to come up with some prototype that reacts to some complex messages that we will send. We have this nice and simple game to play. It’s about Alex. Alex will be in different locations and that changes his mood. Alex doesn’t like to get wet. So the weather condition also changes his mood. We play that and you have to make a prototype using different actuator to respond to it. We made it one step easier for you the below code will receive the messages about the Alex and his world to your boards. at the moment it only prints the values.
- The game play would be something like below.
- Paste this code to your
code.py.They are lots of comments and explanation in the code to make it clear where you can add other functions related to other actuators to tangible respond to Alex and his word.
# ============================================
# Board 4: Game Reactor - Student Template
# ============================================
# Receives data from the Alex game via MQTT.
# Different conditions are set up for you.
# ADD YOUR ACTUATOR CODE INSIDE EACH CONDITION!
# ============================================

import time
import json
from MQTT import Create_MQTT
from settings import settings

time.sleep(2)

# ============================================
# TODO: ADD YOUR IMPORTS HERE
# ============================================
# import board
# import neopixel
# import pwmio
# from adafruit_motor import servo


# ============================================
# TODO: ADD YOUR HARDWARE SETUP HERE
# ============================================
# led = neopixel.NeoPixel(board.D13, 1, auto_write=False)
# pwm = pwmio.PWMOut(board.D10, frequency=50)
# servo_motor = servo.Servo(pwm)


# ============================================
# Current State
# ============================================
location = "UNKNOWN"
mood = 50
weather = "CLEAR"
game_state = "playing"


# ============================================
# MQTT Message Handler
# ============================================
def on_message(client, topic, message):
    global location, mood, weather, game_state

    try:
        data = json.loads(message)

        # ======================================
        # LOCATION
        # ======================================
        if "location" in data and data["location"] != location:
            location = data["location"]

            # --- HERITAGE LOCATIONS ---
            if location == "VINYL HEAVEN":
                print("Entered: VINYL HEAVEN (music store)")
                # TODO: Add actuator for vinyl heaven

            elif location == "OLD LIBRARY":
                print("Entered: OLD LIBRARY (books)")
                # TODO: Add actuator for library

            elif location == "FOUNTAIN":
                print("Entered: FOUNTAIN (peaceful water)")
                # TODO: Add actuator for fountain

            elif location == "PARK PARTY":
                print("Entered: PARK PARTY (friends)")
                # TODO: Add actuator for party

            # --- EVERYDAY LOCATIONS ---
            elif location == "HOME":
                print("Entered: HOME")
                # TODO: Add actuator for home

            elif location == "GROCERY":
                print("Entered: GROCERY")
                # TODO: Add actuator for grocery

            elif location == "BUS STOP":
                print("Entered: BUS STOP")
                # TODO: Add actuator for bus stop

            elif location == "OFFICE":
                print("Entered: OFFICE")
                # TODO: Add actuator for office

            # --- OUTSIDE ---
            elif location == "THE STREET":
                print("Outside: THE STREET")
                # TODO: Add actuator for street

        # ======================================
        # MOOD
        # ======================================
        if "mood" in data and data["mood"] != mood:
            mood = data["mood"]

            if mood < 20:
                print(f"Mood: {mood}% - DESPERATE")
                # TODO: Add actuator for desperate mood

            elif mood < 40:
                print(f"Mood: {mood}% - STRUGGLING")
                # TODO: Add actuator for struggling mood

            elif mood < 60:
                print(f"Mood: {mood}% - NEUTRAL")
                # TODO: Add actuator for neutral mood

            elif mood < 80:
                print(f"Mood: {mood}% - IMPROVING")
                # TODO: Add actuator for improving mood

            else:
                print(f"Mood: {mood}% - THRIVING")
                # TODO: Add actuator for thriving mood

        # ======================================
        # WEATHER
        # ======================================
        if "weather" in data and data["weather"] != weather:
            weather = data["weather"]

            if weather == "CLEAR":
                print("Weather: CLEAR (sunny)")
                # TODO: Add actuator for clear weather

            elif weather == "DRIZZLE":
                print("Weather: DRIZZLE (light rain)")
                # TODO: Add actuator for drizzle

            elif weather == "STORM":
                print("Weather: STORM (heavy rain)")
                # TODO: Add actuator for storm

        # ======================================
        # GAME STATE
        # ======================================
        if "gameState" in data and data["gameState"] != game_state:
            game_state = data["gameState"]

            if game_state == "won":
                print("=== VICTORY! Alex found hope! ===")
                # TODO: Add actuator for winning

            elif game_state == "lost":
                print("=== GAME OVER. Alex was overwhelmed. ===")
                # TODO: Add actuator for losing

    except Exception as e:
        print(f"Error: {e}")


# ============================================
# MQTT Setup
# ============================================
client_id = settings["mqtt_clientid"]
mqtt_topic = settings.get("mqtt_topic")

mqtt_client = Create_MQTT(client_id, message_handler=on_message)
mqtt_client.subscribe(mqtt_topic)

print(f"Subscribed to: {mqtt_topic}")
print("Waiting for game data...")


# ============================================
# Main Loop
# ============================================
while True:
mqtt_client.loop(timeout=0.5)- Open or create
settings.pyin your board and paste this code to it:
settings ={
"ssid": "<your Wi-Fi network>",  # Your WiFi SSID
"password": "<your Wi-Fi password>",  # Your WiFi Password
"mqtt_clientid": "<your device name>",  # Unique client ID for your device
"broker": "<your-namespace>.cloud.shiftr.io", # MQTT Broker URL
"mqtt_user": "<your broker username>", # MQTT Username
"mqtt_password": "<your broker password>",# MQTT Password
"mqtt_port": 1883,  # Default MQTT Port
"mqtt_topic": "<your topic>"  # MQTT topic for LED control
}- You probably need to play the game to test your prototype. Here is the link to it. Here also change the topic to something you specified in the previous step.
https://editor.p5js.org/MahanMehrvarz/full/L_pshdJuM
D. Creating in P5
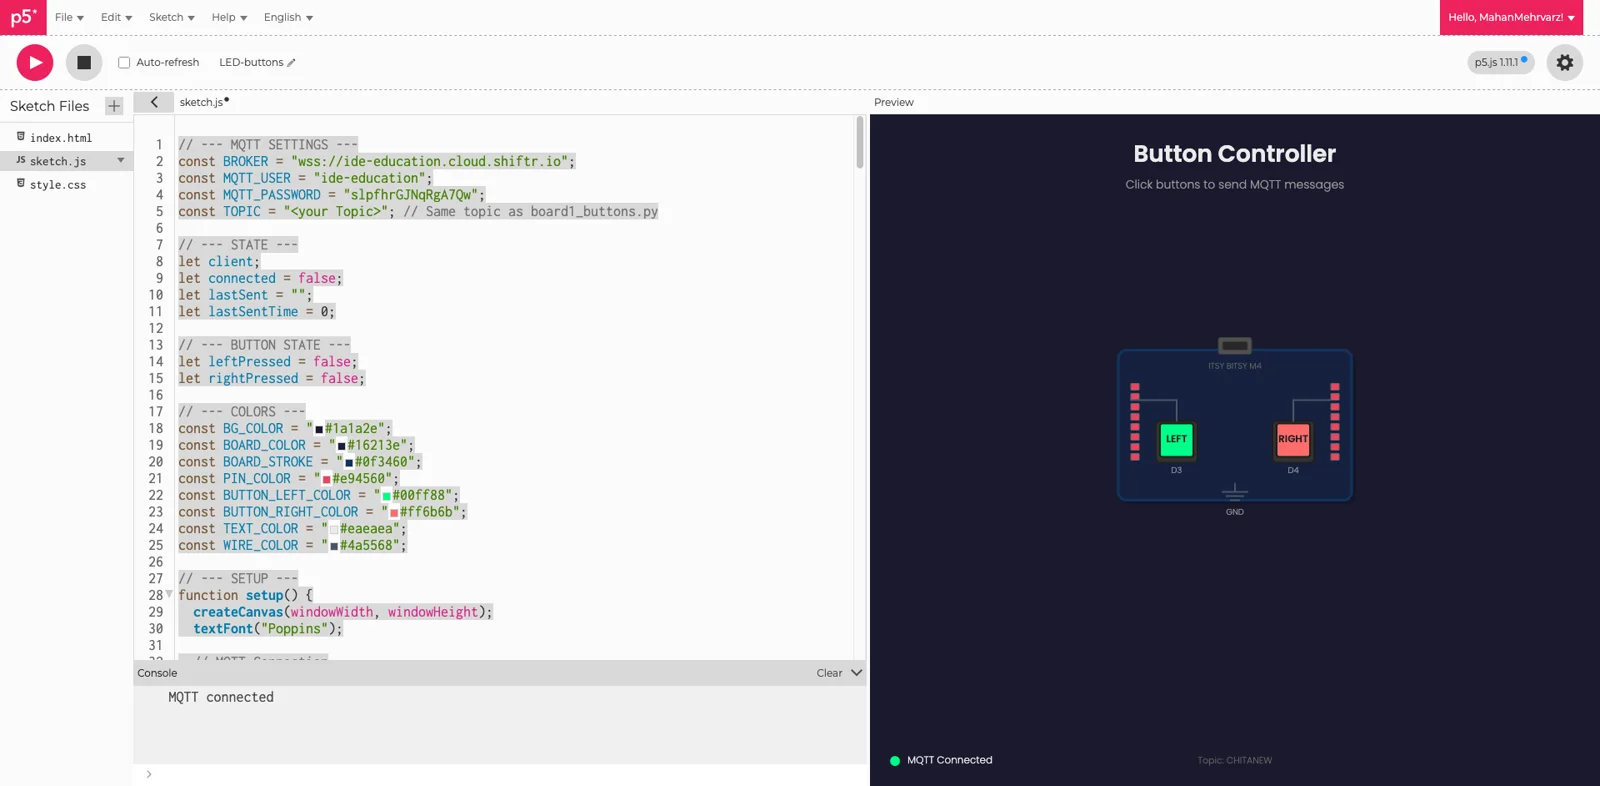
Instead of the buttons you can use an on-screen interaction using something called p5.js. If you follow the steps below, you will be able to control the color of led with a your laptop browser. This P5 sketch will control a board with the code in step 3 of part A. But you can tweak it easily to different actuators.
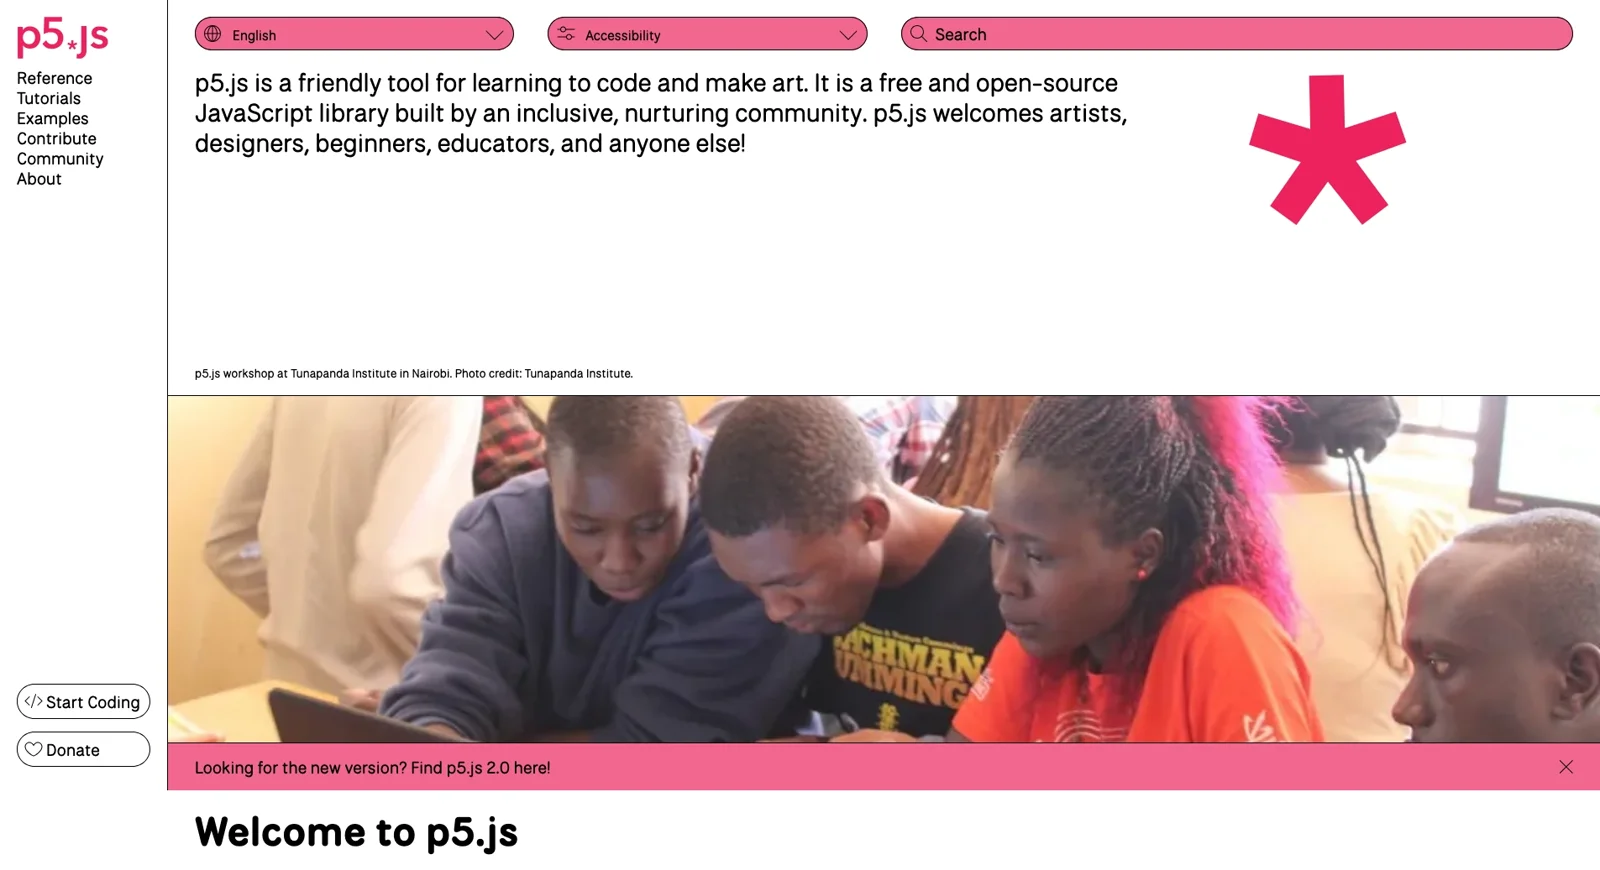
- Click on start coding. and you will be directed to a screen like below:
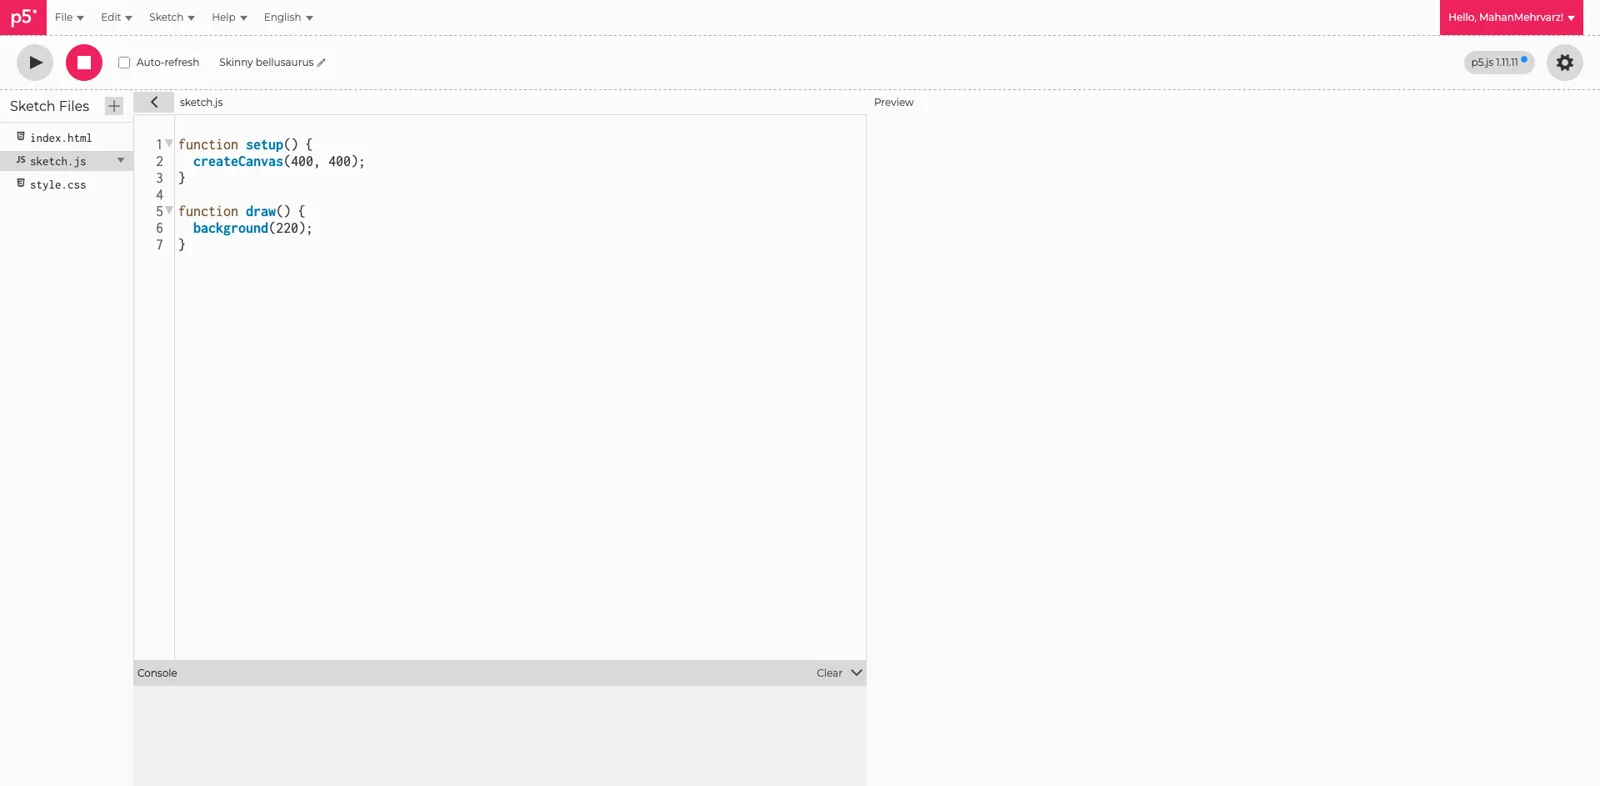
- copy and paste the code below the code below inside the sketch.js file. You have to change
<your topic>to the same thing that is connected. This will be the same as the topic to which your other board connected to actuator or servo subscribed to. check part A step 2.
// --- MQTT SETTINGS ---
const BROKER = "wss://<your-namespace>.cloud.shiftr.io";
const MQTT_USER = "<your broker username>";
const MQTT_PASSWORD = "<your broker password>";
const TOPIC = "<your topic>"; // Same topic as board1_buttons.py

// --- STATE ---
let client;
let connected = false;
let lastSent = "";
let lastSentTime = 0;

// --- BUTTON STATE ---
let leftPressed = false;
let rightPressed = false;

// --- COLORS ---
const BG_COLOR = "#1a1a2e";
const BOARD_COLOR = "#16213e";
const BOARD_STROKE = "#0f3460";
const PIN_COLOR = "#e94560";
const BUTTON_LEFT_COLOR = "#00ff88";
const BUTTON_RIGHT_COLOR = "#ff6b6b";
const TEXT_COLOR = "#eaeaea";
const WIRE_COLOR = "#4a5568";

// --- SETUP ---
function setup() {
  createCanvas(windowWidth, windowHeight);
  textFont("Poppins");

  // MQTT Connection
  client = mqtt.connect(BROKER, {
    username: MQTT_USER,
    password: MQTT_PASSWORD,
  });

  client.on("connect", () => {
    connected = true;
    console.log("MQTT connected");
  });

  client.on("close", () => {
    connected = false;
    console.warn("MQTT closed");
  });

  client.on("error", (err) => {
    connected = false;
    console.error("MQTT error", err);
  });
}

// --- DRAW ---
function draw() {
  background(BG_COLOR);

  // Title
  fill(TEXT_COLOR);
  textAlign(CENTER, CENTER);
  textSize(28);
  textStyle(BOLD);
  text("Button Controller", width / 2, 50);

  textSize(14);
  textStyle(NORMAL);
  fill(150);
  text("Click buttons to send MQTT messages", width / 2, 85);

  // Draw the schematic
  push();
  translate(width / 2, height / 2 - 30);
  drawSchematic();
  pop();

  // Status bar
  drawStatus();

  // Fade button press animation
  if (leftPressed && millis() - lastSentTime > 150) leftPressed = false;
  if (rightPressed && millis() - lastSentTime > 150) rightPressed = false;
}

// --- DRAW SCHEMATIC ---
function drawSchematic() {
  // Board outline (Itsy Bitsy style)
  const boardW = 280;
  const boardH = 180;

  // Board shadow
  fill(0, 50);
  noStroke();
  rect(-boardW / 2 + 5, -boardH / 2 + 5, boardW, boardH, 10);

  // Board
  fill(BOARD_COLOR);
  stroke(BOARD_STROKE);
  strokeWeight(3);
  rect(-boardW / 2, -boardH / 2, boardW, boardH, 10);

  // Board label
  fill(100);
  noStroke();
  textSize(10);
  textAlign(CENTER, CENTER);
  text("ITSY BITSY M4", 0, -boardH / 2 + 20);

  // USB connector
  fill(80);
  stroke(60);
  strokeWeight(1);
  rect(-20, -boardH / 2 - 15, 40, 20, 3);
  fill(40);
  rect(-15, -boardH / 2 - 10, 30, 10, 2);

  // Pin headers (left side)
  drawPinHeader(-boardW / 2 + 15, -50, 8, "left");

  // Pin headers (right side)
  drawPinHeader(boardW / 2 - 25, -50, 8, "right");

  // Left Button (D3)
  const leftBtnX = -70;
  const leftBtnY = 20;
  drawButton(leftBtnX, leftBtnY, "LEFT", BUTTON_LEFT_COLOR, leftPressed, "D3");

  // Right Button (D4)
  const rightBtnX = 70;
  const rightBtnY = 20;
  drawButton(rightBtnX, rightBtnY, "RIGHT", BUTTON_RIGHT_COLOR, rightPressed, "D4");

  // Wires from buttons to pins
  stroke(WIRE_COLOR);
  strokeWeight(2);
  noFill();

  // Left button wire
  line(leftBtnX, leftBtnY - 25, leftBtnX, -30);
  line(leftBtnX, -30, -boardW / 2 + 15, -30);

  // Right button wire
  line(rightBtnX, rightBtnY - 25, rightBtnX, -30);
  line(rightBtnX, -30, boardW / 2 - 25, -30);

  // Ground symbol
  drawGround(0, boardH / 2 - 20);
}

// --- DRAW BUTTON ---
function drawButton(x, y, label, color, pressed, pinLabel) {
  push();
  translate(x, y);

  // Button base
  fill(50);
  stroke(30);
  strokeWeight(2);
  rect(-25, -25, 50, 50, 5);

  // Button top (pressed state)
  if (pressed) {
    fill(red(color) * 0.7, green(color) * 0.7, blue(color) * 0.7);
    rect(-20, -18, 40, 40, 3);
  } else {
    fill(color);
    rect(-20, -22, 40, 40, 3);
  }

  // Button label
  fill(30);
  noStroke();
  textSize(12);
  textStyle(BOLD);
  text(label, 0, pressed ? 2 : -2);

  // Pin label
  fill(150);
  textSize(10);
  textStyle(NORMAL);
  text(pinLabel, 0, 35);

  pop();
}

// --- DRAW PIN HEADER ---
function drawPinHeader(x, y, count, side) {
  push();
  translate(x, y);

  for (let i = 0; i < count; i++) {
    fill(PIN_COLOR);
    stroke(100);
    strokeWeight(1);
    rect(0, i * 12, 10, 8, 1);
  }

  pop();
}

// --- DRAW GROUND SYMBOL ---
function drawGround(x, y) {
  push();
  translate(x, y);
  stroke(WIRE_COLOR);
  strokeWeight(2);

  line(0, 0, 0, 10);
  line(-15, 10, 15, 10);
  line(-10, 15, 10, 15);
  line(-5, 20, 5, 20);

  fill(150);
  noStroke();
  textSize(10);
  text("GND", 0, 35);

  pop();
}

// --- DRAW STATUS ---
function drawStatus() {
  // Connection status
  fill(connected ? "#00ff88" : "#ff6b6b");
  noStroke();
  ellipse(30, height - 30, 12, 12);

  fill(TEXT_COLOR);
  textAlign(LEFT, CENTER);
  textSize(12);
  text(connected ? "MQTT Connected" : "MQTT Disconnected", 45, height - 30);

  // Last sent message
  if (lastSent) {
    textAlign(RIGHT, CENTER);
    fill(150);
    const ago = ((millis() - lastSentTime) / 1000).toFixed(1);
    text(`Last sent: "${lastSent}" (${ago}s ago)`, width - 20, height - 30);
  }

  // Topic info
  textAlign(CENTER, CENTER);
  fill(100);
  textSize(11);
  text(`Topic: ${TOPIC}`, width / 2, height - 30);
}

// --- MOUSE INTERACTION ---
function mousePressed() {
  const cx = width / 2;
  const cy = height / 2 - 30;

  // Left button hitbox (GREEN = more green = send "right")
  const leftBtnX = cx - 70;
  const leftBtnY = cy + 20;
  if (mouseX > leftBtnX - 25 && mouseX < leftBtnX + 25 &&
      mouseY > leftBtnY - 25 && mouseY < leftBtnY + 25) {
    sendMessage("right");
    leftPressed = true;
  }

  // Right button hitbox (RED = more red = send "left")
  const rightBtnX = cx + 70;
  const rightBtnY = cy + 20;
  if (mouseX > rightBtnX - 25 && mouseX < rightBtnX + 25 &&
      mouseY > rightBtnY - 25 && mouseY < rightBtnY + 25) {
    sendMessage("left");
    rightPressed = true;
  }
}

// --- KEYBOARD INTERACTION ---
function keyPressed() {
  if (key === "ArrowLeft" || key === "a" || key === "A") {
    sendMessage("right");
    leftPressed = true;
  }
  if (key === "ArrowRight" || key === "d" || key === "D") {
    sendMessage("left");
    rightPressed = true;
  }
}

// --- SEND MESSAGE ---
function sendMessage(msg) {
  if (!connected) {
    console.warn("Not connected to MQTT");
    return;
  }

  client.publish(TOPIC, msg);
  lastSent = msg;
  lastSentTime = millis();
  console.log(`Sent: "${msg}" to topic: ${TOPIC}`);
}

// --- RESIZE ---
function windowResized() {
  resizeCanvas(windowWidth, windowHeight);
}Step Five is for you to solve!- You have to also also replace the
index.htmlfile content with the code below:
<!DOCTYPE html>
<html lang="en">
  <head>
    <meta charset="utf-8" />

    <!-- p5.js -->
    <script src="https://cdnjs.cloudflare.com/ajax/libs/p5.js/1.11.1/p5.js"></script>

    <!-- mqtt.js (browser build) -->
    <script src="https://unpkg.com/mqtt/dist/mqtt.min.js"></script>

    <!-- Poppins -->
    <link rel="preconnect" href="https://fonts.googleapis.com">
    <link rel="preconnect" href="https://fonts.gstatic.com" crossorigin>
    <link href="https://fonts.googleapis.com/css2?family=Poppins:wght@300;600&display=swap" rel="stylesheet">

    <title>Button Controller</title>

    <style>
      html, body {
        margin: 0;
        padding: 0;
        background: #1a1a2e;
        font-family: "Poppins", sans-serif;
        overflow: hidden;
      }
      canvas {
        display: block;
      }
    </style>
  </head>

  <body>
    <script src="sketch.js"></script>
  </body>
</html>
Now when you press play you see something like below. Pressing the Green or Red button on the screen do the same thing as pressing the buttons on the the board.